

Wildlife photography can feel intimidating, especially when you are not using professional-level camera gear. But here is the truth: you don’t need a $5,000 lens to take amazing wildlife shots. With the right techniques and gear, you can already capture powerful, eye-catching images of animals in the wild.
Over the past decade, I’ve travelled to more than 35 countries, where photographing wildlife is always at the top of my list. As a former board member of an animal welfare organisation that operates the largest animal hospital in the Southern Hemisphere, where over half the patients are wildlife, I have learned not just about photography, but also about animal behaviour, safety, and ethical practices.
This guide shares 12 practical tips for wildlife photography, whether you are shooting with a mobile phone, a compact camera, or a mirrorless or DSLR setup. These tips are universal – they are what I personally use, no matter the gear in my hands.
If you want to take stunning wildlife photos without the stress (or the price tag), you are in the right place.
When it comes to wildlife photography, sharp eyes make all the difference. The eyes are where the emotion lives. Whether it’s a curious orangutan, a cautious wombat, or a soaring eagle, if the eyes are in focus, your photo instantly feels more powerful and intimate.
It is one of the simplest yet most effective ways to create a connection between the viewer and the animal, regardless of what type of camera you are using.
Here is how to do it on any device:
📸 Pro Tip: If the eyes aren’t in focus, it doesn’t matter how perfect the lighting or background is; your photo will feel flat.
➡️ Want to practice on a surprisingly expressive animal? Head over to my guide, “Where to See Wombats in Australia,” for some great spots to test your skills.

Sometimes, the most powerful wildlife images are not the ones filled edge to edge with detail, but the ones with space to breathe. Negative space (the area around your subject) helps draw the eye exactly where you want it to go. It adds a sense of scale, calm, and focus, especially when photographing wildlife in busy or natural environments.
Rather than zooming in as tightly as possible, try pulling back just a little. Leave space above, below, or beside your subject to let the animal stand out on its own.
This works beautifully on all camera types:
📸 Pro Tip: A lion framed against a wide-open savannah or a bird perched against a clear sky often creates a more striking image than a full-frame close-up.
For a masterclass in simplicity and story, check out Ami Vitale’s work. Her use of space and storytelling through composition is world-renowned.

The rule of thirds is one of the most basic composition tools in photography and for good reason. It helps you move beyond “dead centre” shots and create more dynamic, balanced images.
But here is the twist: when photographing wildlife, position the animal so it has space to “look” or “move” into.
Here is how it works:
This simple shift gives your photo a sense of movement and story. It feels more natural to our eyes and helps the viewer anticipate what the animal might do next.
🦓 Real-World Example: When photographing wombats at Cradle Mountain in Tasmania, I used this technique to frame them walking across the wetlands. By giving them “room” in the frame, the image told a stronger story of their journey.
➡️ Want to see where I captured some of these moments? Check out Where to See Wombats in Australia.

Ever wondered how professional wildlife photos get that soft, creamy background that makes the animal stand out so clearly? That effect is called bokeh, and it’s one of the most effective ways to make your subject the star of the shot.
What is Bokeh?
Bokeh refers to the quality of the out-of-focus areas in a photo. It helps isolate your subject from distracting background elements, such as trees, branches, or distant tourists, so your viewer’s attention stays right where you want it.
How to Achieve Bokeh (No Matter Your Gear)
🎥 Example in Action: Brian Skerry’s underwater wildlife photography shows how powerful bokeh can be even underwater. His images often feature sharp subjects floating in soft, colourful backgrounds, drawing the viewer’s eye immediately to the marine life.
📸 Pro Tip: If your background is too cluttered, use bokeh to “clean it up” and focus only on what matters.

Wildlife doesn’t send a calendar invite. It appears when it wants to and disappears just as fast. That’s why being prepared at all times is one of the most important habits for any wildlife photographer.
This means two things:
How to Stay Ready for Wildlife Moments:
Weather Prep is Just as Important:
🎒 Travel Essentials: We never leave for a wildlife trip without our Survival First Aid Kit. It’s compact, practical, and has come in handy more times than I can count.
🔌 Bonus Tip: Do not get caught with a dead battery! We always travel with Power Banks but make sure you understand rules around flying with them. Check out my guide: Can You Take a Power Bank onto a Plane: 8 Important Tips.

The sound of a camera shutter might be satisfying to you, but to a wild animal, it can be startling. In many cases, that subtle click is enough to send your subject running (or flying) away. That is where silent shutter or live mode comes in.
These settings minimise or eliminate shutter noise, helping you capture more natural behaviour and more photos before the moment passes.
How to Use It:
📸 Pro Tip: Silent shutter is also perfect for photographing shy or easily spooked animals like birds, deer, or smaller marsupials.
Not only is this better for your photo, but it’s also better for the animal, too.

One of the simplest ways to make your wildlife photography more compelling? Change your angle.
Photographing animals at eye level (or even lower) creates a stronger sense of connection and realism. It makes your viewer feel like they are right there in the moment, not just looking down on a scene from above.
This is especially powerful for:
How to Do It:
📸 Pro Tip: Getting low also improves stability – your elbows or knees make great natural tripods.
➡️ Want to try this in the wild? Read my post on Where to See Komodo Dragons: Your Indonesia Guide. Getting low (at a safe distance) was the key to capturing some of my favourite shots on that trip.

Great wildlife photography isn’t just about gear or timing; it’s about understanding your subject. Even a few minutes of observation can help you predict where an animal will move, how it behaves, and when the perfect shot might happen.
This doesn’t mean you need to be a biologist. But learning to slow down, watch, and wait will dramatically improve your results.
Why It Works:
How to Start:
🦘 Pro Insight: My experience on the board of an animal welfare organisation has taught me that calm observation is often the most respectful and rewarding approach. Animals are not props. They are individuals with rhythms and reactions we can learn from. Read my post on Ethical Animal Tourism.

Framing is a classic composition technique, and nature provides plenty of opportunities to do it beautifully.
Look for branches, leaves, rocks, or even shafts of light that naturally frame your subject. These elements not only draw the viewer’s eye directly to the animal but also add depth and context to the scene.
How to Spot Natural Frames:
This technique works just as well on mobile phones as it does on DSLRs – it’s all about positioning, not equipment.
📸 Pro Tip: Use natural frames to hide distractions. If there is a tourist in the background or a man-made structure, a leafy branch or tall grass can help cover it while improving the photo.
This technique encourages you to interact with the landscape and think creatively, something that can turn an average photo into a truly memorable one.

In wildlife photography, your best photo is rarely your first. Or your tenth.
It is totally normal to take dozens – or even hundreds – of shots to get one image that truly captures the moment – the light changes. The animal moves. You blink. That’s why pros rely on volume, and so should you.
Embrace the “Spray and Pray” (Within Reason):
🐿️ Real Talk: While photographing chipmunks and squirrels in Canada, I took over 150 shots just to capture one perfect moment of a squirrel. Was it worth it? Absolutely. This also means you usually need more than one memory card. Read my article on The Best Memory Card for Travel.
For a fun reminder that even the wildlife can have off-moments, check out the Comedy Wildlife Awards. These hilarious entries prove that wildlife photography is as unpredictable as the animals themselves and that sometimes, the “bad” shot ends up being the best one.

Flash photography and wildlife rarely mix well.
A sudden burst of light can startle animals, disrupt their natural behaviour, and ruin an otherwise beautiful moment. It can also create harsh shadows, unnatural colours, and red-eye, all things you definitely don’t want in a wildlife photo.
Why Flash is a No-Go:
What to Do Instead:
📸 Pro Tip: A naturally lit photo, even if slightly grainy, always feels more authentic than one blasted with artificial light.
💾 Extra Tip: If you are shooting in low light or using burst mode, you will fill your memory card fast. Make sure you are using a card that’s fast, reliable, and fits your gear. Here are 6 Key Considerations for Choosing the Best Memory Card for Travel.
Sharpness can make or break a wildlife photo, and camera shake is one of the most common reasons a shot falls flat. But you don’t need to lug around a heavy tripod to get crisp results. You just need to know how to stabilise your camera with what is already around you.
Easy Ways to Steady Your Shot:
Travel-Friendly Gear:
If you also enjoy capturing wildlife video on the go, these compact tools are great stabilisers for action footage and quick clips, even if you’re moving:
While these are primarily designed for video, we find them useful for capturing dynamic moments when still photography isn’t enough, or for creating reels or stories from your wildlife encounters.
One of the best ways to grow as a wildlife photographer is to study the work of professionals. Not to copy, but to understand how they use light, space, angles, and timing to tell powerful visual stories.
Here are three sources of inspiration that I turn to often:
A Nikon Ambassador and National Geographic wildlife photographer, Ami’s work captures both the beauty and the fragility of wildlife. Her use of light, composition, and cultural storytelling is a masterclass in purpose-driven photography.
Renowned for his stunning underwater wildlife photography, Brian’s work reminds us of the power of patience and precision, especially in challenging environments. His ability to use bokeh and natural light underwater is next-level.
😂 Comedy Wildlife Photography Awards
Because not every shot has to be serious – these images prove that even “mistakes” can be magical and that wildlife photography has plenty of room for humour, heart, and surprise.
📸 Pro Tip: Follow photographers you admire on social media. Seeing great wildlife photography in your feed keeps you inspired, motivated, and always learning.
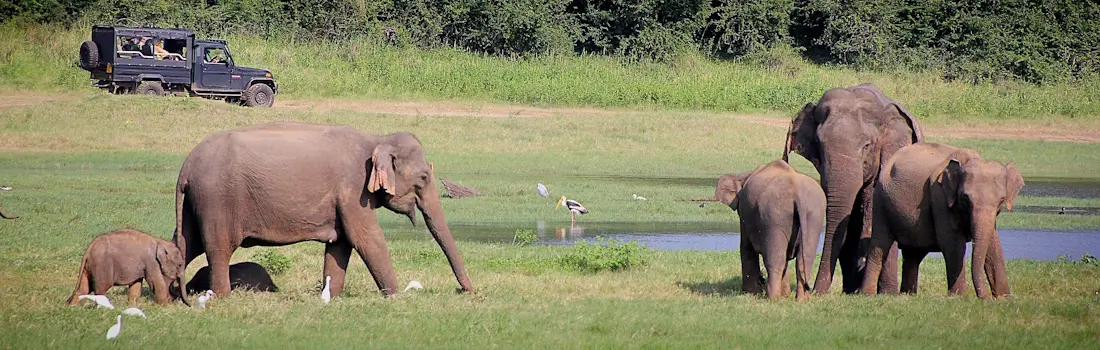
You don’t need expensive gear to take stunning wildlife photos; you just need to be intentional, observant, and ready. These 12 practical tips are the exact ones I use, whether I’m photographing wombats in Australia, chipmunks in Canada, or elephants in Sri Lanka. And I’ve used them with everything from my mobile phone to my mirrorless Nikon setup.
What matters most is not what’s in your hands, but how you use it.
Remember: great wildlife photography is about respect – for the animals, for their environment, and for the story you’re capturing. When you take the time to focus on composition, patience, and preparation, your images will reflect that care and connection.
If you’re heading on a wildlife-focused adventure soon, don’t miss my guide to The Best Camera for a Safari in Sri Lanka.
And if you found this post helpful, feel free to share it with a fellow traveller or tag me on social media in your own wildlife shots – I’d love to see them.
What is the best time of day for wildlife photography?
The best times are early morning and late afternoon – often called the golden hours. The light is softer, wildlife is more active, and your photos will have a natural warmth that is hard to replicate at midday.
Can I take good wildlife photos with a phone?
Yes! Many of the tips in this article work perfectly with a mobile phone. Focus on composition, lighting, and timing. Features like portrait mode, burst mode, and gridlines can help you capture professional-looking shots with your phone.
Do I need a tripod for wildlife photography?
Not necessarily. You can stabilise your camera using trees, rocks, or even your knees. However, if you are planning to shoot in low light or with a long zoom lens, a compact tripod or stabiliser can be a helpful addition.
Should I use flash in wildlife photography?
No – flash can startle wildlife and ruin the natural atmosphere of your photo. Instead, adjust your ISO or exposure, and shoot during times when natural light is most flattering.
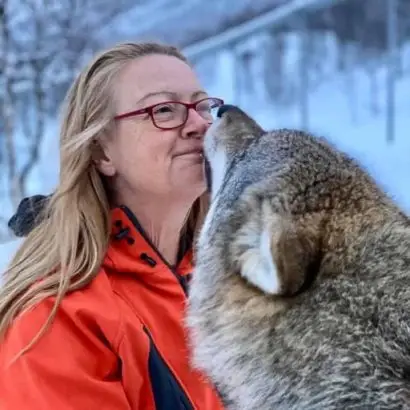
Hi, I’m Lisa Bundesen - the voice behind The Middle Age Wanderer. I’m a retired chartered accountant turned passionate traveller and photographer. Alongside my husband Darren (and with our two fur babies waiting at home in Australia), we explore the world one adventure at a time.
I’ve travelled to over 35 countries, and I created this blog to inspire fellow travellers in their 50s, 60s, and beyond to embrace adventure. Whether it’s hiking ancient trails, diving into new cultures, or sipping wine in scenic places, I believe life after 50 is the perfect time to explore more.
Here, you’ll find honest travel advice, destination guides, and real stories to help you travel smarter and with more confidence - because age is not a barrier, it’s an invitation.


Explore the World with Us!
Join our newsletter for travel advice, tips and inspiration.
Hi, I’m Lisa, a 50+ retired chartered accountant. My husband, Darren, and I explore the world every opportunity we get. Staying fit is key to our adventures, from hiking the Inca Trail to scuba diving. We call Australia home but travel overseas often, always eager to discover new cultures, bustling cities, cuisines, nature and wildlife.
We would love you to join us on our journeys and hope that our adventures give you encouragement to explore this amazing world.
Some of the links below are affiliate links, meaning, at no additional cost to you, I will earn a commission if you click through and make a purchase. This helps me to keep bringing you travel updates and news. See my Disclosure Policy for more information.
I only recommend companies and products that I personally use.
Explore the World with Us!
Join my newsletter for travel advice, tips and inspiration.
As Seen On
Recent Posts


Categories
Action Camera We Use

Where We Book Accommodation
How We Research Flights

How We Protect Our Laptop

Our Hiking Guide

Related Posts
Wildlife photography made simple: 12 practical tips for stunning photos with any camera – mobile, mirrorless, DSLR or point-and-shoot.

Should I buy a drone for travel? Discover 10 key things to know before buying your first drone, from laws and batteries to the best beginner models.
While I really do not like having my photo taken, it is nice to be in some travel photos to show you actually did go to those amazing places.

Discover key tips for safely taking a drone on a plane and capturing stunning aerial shots during your travels.
Discover 6 key considerations when choosing the best memory card for travel to capture and save your precious memories on the go.